Sewayojan Registration: Complete Process, Documents and Common Mistakes
If you live in Uttar Pradesh and are looking for a job, chances are you have already come across the name Sewayojan. It is the state government’s official employment portal, run by the Department of Training & Employment, and lately it also goes by the name Rojgaar Sangam, U.P. Whatever name you know it by, the purpose stays the same — connecting job seekers with employers, publishing government job openings, and helping unemployed youth access the Berojgari Bhatta allowance.
If you are from UP and haven’t registered yet, you could be missing out on quite a bit — a government vacancy, a private sector job, or even the monthly unemployment allowance. This post walks through the entire registration process step by step, the documents you’ll need, the problems people commonly run into, and how to fix them.
What Sewayojan Registration Actually Means
Sewayojan registration is the process of creating your profile on UP’s employment exchange system. Once you’re registered, your details stay with the department, and that same data gets used whenever:
- You’re being checked for eligibility for a government job
- A private employer in your district is searching for candidates
- A Rojgar Mela (employment fair) notification goes out
- You apply for Berojgari Bhatta
Without registration, none of these services are available to you. This is why it’s the first and most important step, regardless of whether your highest qualification is class 10 or a postgraduate degree — the process stays the same for everyone.
One thing worth clearing up early: Sewayojan and Rojgaar Sangam are not two different portals. It’s the same system, just with updated branding. People search for it under both names, and the site recognizes both. The same goes for terms like “seva yojana,” “rojgar sangam,” and “rojgar seva” — these all lead back to the same portal.
What to Keep Ready Before You Start
A lot of people open the registration form and then get stuck halfway because they don’t have the required documents on hand. Before you begin, make sure you have the following ready:
- Aadhaar card — your mobile number needs to be linked to it, since the OTP verification depends on this.
- An active mobile number — the same one linked to your Aadhaar.
- A working email address — for confirmations and future updates.
- Passport-size photo — a digital copy in JPG or PNG format.
- Educational certificates — from class 10 onward, up to your highest qualification.
- Caste, income, or domicile certificate — needed if you belong to a reserved category or plan on applying for Berojgari Bhatta.
If any of these are missing, sort them out first. The Aadhaar-linked mobile number matters the most — if that number is disconnected or belongs to someone else now, the registration process will stall midway. In that case, you’ll need to visit the nearest Aadhaar Seva Kendra to update your mobile number before proceeding.
Step-by-Step Sewayojan Registration Process
Here’s the main process, broken down step by step. It’s straightforward as long as you follow it in order.
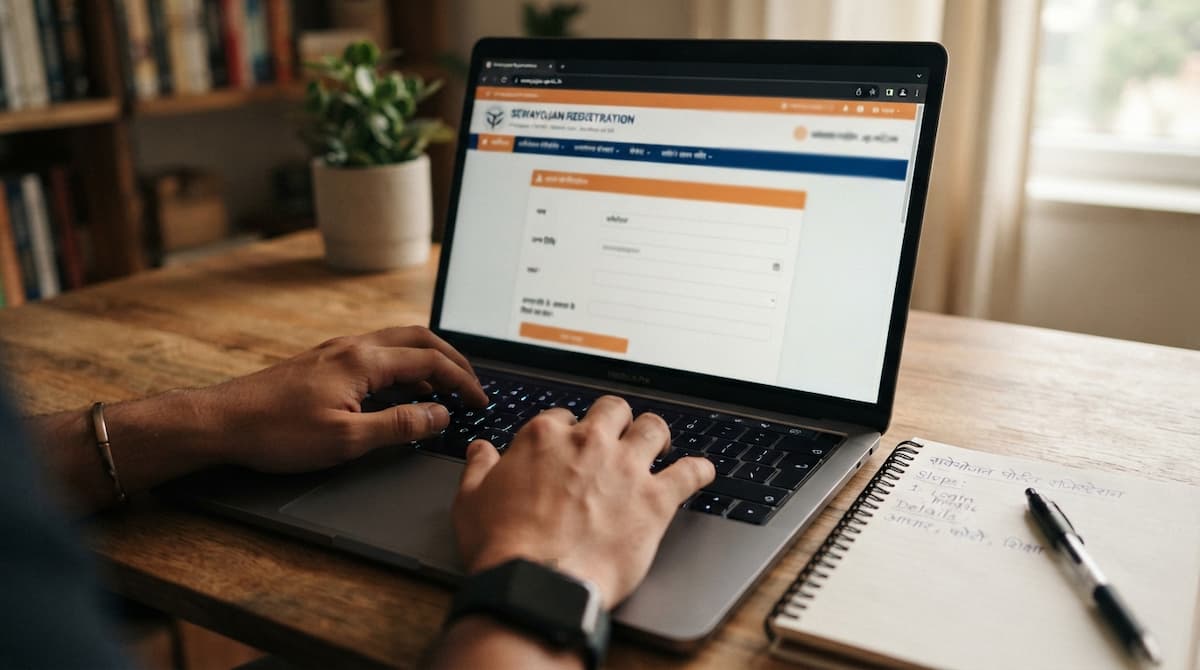
Step 1 — Open the Official Website
Go to sewayojan.up.nic.in. One important thing to keep in mind here — there are several third-party sites floating around that claim to offer an “official Sewayojan registration link” and use this to collect people’s personal data. Don’t use any of these. Stick only to the official government URL.
On the homepage, you’ll find a “New Account” option in the top menu. Select “Jobseeker” from there.
Step 2 — Fill the Signup Form
A form will open with a few mandatory (starred) fields. These should be filled out exactly as they appear on your Aadhaar card:
- First Name
- Aadhar No.
- Mobile No.
- Email Id
- DOB (in yyyy-mm-dd format)
- Gender (Male / Female / Transgender)
- User Id (you choose this yourself)
- Password
A common mistake here is entering a name or date of birth that’s slightly different from what’s on the Aadhaar card — a spelling difference or wrong date format. This causes Aadhaar verification to fail later on. So whatever details are printed on your Aadhaar, enter them exactly the same way in the form.
Step 3 — Set Your Password
The portal displays a set of rules while you create your password:
- Between 8 and 12 characters
- At least one uppercase letter
- At least one lowercase letter
- At least one number
- At least one special character (valid ones: @, #, $, *)
A format like “Sample@123” is considered valid. Pick something you can remember easily but that’s still hard for anyone else to guess.
Step 4 — Give Aadhaar Consent
Next, you’ll see a checkbox for UIDAI authentication consent — you’re agreeing to have your demographic or biometric details verified. This needs to be ticked before you can move forward.
Step 5 — Solve the Captcha
A simple math captcha will appear, something like “80 + 75 = ?”. Enter the answer and click “Verify Aadhar No.”
Step 6 — Verify Aadhaar OTP
An OTP will be sent to your Aadhaar-linked mobile number. Enter it and submit. If the OTP doesn’t arrive, check the troubleshooting section further down.
Step 7 — Log In and Complete Your Profile
Once registration is done, log in with your User Id and password. The dashboard will show 9 sections that need to be completed in order:
- Personal Info — name, parents’ names, marital status, religion, photo
- Contact — address, state, district, tehsil, block, village, PIN code
- Physical — height, weight, blood group, eyesight
- Education — qualifications from class 10 onward
- Language / Education Knowledge — which languages you can read, write, and speak
- Skills — technical and soft skills
- Experience — previous employment history, if any
- Preference — preferred job location, type, and expected salary
- Declaration — verifying everything and submitting
One important thing to note — these sections have to be completed in sequence. You can’t skip ahead. If you try jumping from Personal Info straight to Skills, the profile won’t save. So work through them in order: Personal Info, then Contact, and so on.
Step 8 — Download the X-10 Report
After final submission, the system automatically generates an “X-10 Report.” This is your proof of registration, and it’s worth downloading and printing right away. It gets asked for at Rojgar Mela events and during Berojgari Bhatta verification. If a printer isn’t handy, saving it as a PDF works too — district offices generally accept that.
If you’d like a visual, screenshot-by-screenshot walkthrough of every one of these steps, the sewayojan portal already has detailed, screen-by-screen guidance covering exactly this process.
How to Log In After Registration
Once you’re registered, logging back in is simple:
- Go to sewayojan.up.nic.in/IEP/Login.aspx
- Select your role — Jobseeker, Employer, Sewa Mitra, or Departmental Officer
- Enter your User Id and Password
- Solve the captcha
- Click Submit
If login isn’t working, check Caps Lock first — passwords are case-sensitive. Even a small case mismatch will cause login to fail.
Common Problems People Run Into During Registration
Here are the issues that come up most often during registration, along with practical fixes.
OTP isn’t arriving. First, check your mobile signal. If you have any SMS-blocking app installed, disable it temporarily. Also confirm that the number you’re using is the one actually linked to your Aadhaar. Wait 60 seconds and request the OTP again. If it still doesn’t come through and your Aadhaar-linked mobile number has been permanently disconnected, you’ll need to visit an Aadhaar Seva Kendra to update it first.
Photo upload keeps failing. The photo needs to be in JPG or PNG format and within the size limit shown on the upload field. If the file is too large, try re-saving it at a lower resolution. Crop it to the standard passport ratio — 3.5cm by 4.5cm.
Aadhaar verification keeps failing. This is the most common issue, and it’s usually caused by a mismatch in name or date of birth. Whatever’s printed on your Aadhaar needs to match the form exactly — spelling, DOB format, all of it. Also double-check that your Aadhaar is currently active.
Captcha keeps reloading. Try switching browsers, or temporarily disable strict ad-blockers for the .nic.in domain. Make sure cookies are allowed too.
Account shows as locked. After several failed login attempts, the account gets temporarily locked. Wait 15 to 30 minutes and try again. If it’s still locked after that, use the Forgot Password option to reset your credentials.
Profile won’t save. As mentioned earlier, the 9 profile sections need to be completed in order. Skipping a section midway will prevent the profile from saving.
Need to change your mobile number. Log in and request a mobile number change from your profile — this requires OTP verification on both the old and new numbers. If the old number is permanently lost, you’ll need to visit the district employment office with ID proof.
Berojgari Bhatta — The Next Step After Registration
A lot of people register on Sewayojan specifically so they can apply for Berojgari Bhatta, the UP government’s monthly allowance for educated, unemployed youth.
The amount generally falls between ₹1,000 and ₹1,500 per month, though the exact figure changes depending on the current notification. It’s worth checking the latest notification before applying.
General eligibility criteria:
- Must be a permanent resident of UP
- Age generally between 21 and 35 years (some notifications allow from 18)
- Minimum qualification of class 10 or 12
- Currently unemployed — not in a salaried job or full-time education
- Family income below a set ceiling (commonly ₹3 lakh per year)
- A complete, registered profile on Sewayojan
The application process is fairly direct — complete your registration and full profile first, then log in and open the Berojgari Bhatta application section from your dashboard, verify the auto-filled details, upload the required documents, and submit the declaration. You can track the status from your dashboard. Once approved, payment comes through DBT into your Aadhaar-linked bank account.
One important point — if you find employment, you’re required to inform the Employment Department within the specified time window. Continuing to claim the allowance after getting a job is treated as fraud and can lead to recovery proceedings.
Common reasons applications get rejected:
- Mismatch between Aadhaar details and profile data
- Income certificate issued by an unrecognized authority
- Incomplete profile or missing documents
- An existing employment record traceable through PAN or EPFO
How to Search for Jobs After Registering
Once registration is complete, the real work begins — job searching. Sewayojan lists jobs under four categories:
- Government Jobs — posted directly by UP government departments, with filters for Post, Department, District, and Recruitment Type.
- Private Jobs — posted by registered private employers, filterable by Salary Limit, Job Type, and District.
- Outsource Jobs — posted by outsourcing agencies, more common for district-level support roles.
- Rojgar Mela Jobs — offered through scheduled employment fairs.
A practical tip is to keep your profile updated at all times, since recruiters only see the latest version. Turn on SMS and email alerts from your dashboard so you don’t miss out on new openings.
Rojgar Mela — Making the Most of Employment Fairs
Rojgar Mela is a scheduled event where multiple employers show up at a single venue and conduct on-the-spot interviews. Sewayojan registration is required to take part.
The department sends notifications for upcoming melas both on the portal and to your registered mobile number. Keep checking the Rojgar Mela section on your dashboard after logging in — these events happen at the district level, whether that’s Lucknow, Kanpur, Varanasi, or any other major district.
When attending a mela, carry a printed copy of your X-10 Report, original and photocopied educational certificates, Aadhaar, recent photographs, and an updated resume. Many employers shortlist candidates the same day, so it helps to be interview-ready.
Employer and Sewa Mitra Registration — What’s the Difference
Sewayojan isn’t just for job seekers. Companies and government departments can also register as an Employer to access a pool of verified candidates. This process also starts from the “New Account” menu, just selecting “Employer” instead of “Jobseeker.” Employer verification checks PAN details, registration certificate, and contact information.
There’s another role — Sewa Mitra. This is meant for people assigned to specific UP service-delivery schemes. If you’re registering for a general job or Berojgari Bhatta, don’t select Sewa Mitra — Jobseeker is the correct choice.
Registration Renewal — When and Why It Matters
Something a lot of people overlook — Sewayojan registration doesn’t stay valid forever. It generally needs renewal after 3 years. As the expiry date approaches, a renewal link starts appearing on your dashboard.
If you don’t renew on time, access to services like Rojgar Mela and Bhatta can get affected. So check your dashboard once every few months, especially if you’re not actively job hunting at the moment.
Is Sewayojan Registration Free
Yes, entirely free. Whether you’re registering as a Jobseeker, Employer, or Sewa Mitra, there’s no fee involved at any stage. If a website or agent is asking for money, that’s not the official process — go directly to sewayojan.up.nic.in instead.
Is Sewayojan Only for Uttar Pradesh
Yes, Sewayojan is exclusively for Uttar Pradesh residents. If you’re from another state, you’ll need to use that state’s own employment portal — Maharashtra residents can check mahaswayam.gov.in, for instance, or use the National Career Service (ncs.gov.in), which operates across the country.
How Registration Differs by Qualification Level
A question that comes up often — does the registration process differ for a class 10 pass-out versus a graduate? The answer is no, the process stays the same. The only difference lies in what gets filled into the Education section.
For class 10 or 12 pass candidates. You’ll follow the same basic process — Personal Info, Contact, and the rest. The Education section only needs class 10 or 12 details. These candidates often qualify more readily for Outsource Jobs or district-level Rojgar Mela postings.
For ITI or Diploma holders. These candidates need to mention their trade and institute name in the Education section. Being specific about technical skills in the Skills section helps too, since private employers often filter candidates based on that.
For Graduates and Postgraduates. Candidates with higher qualifications tend to apply more under Government Jobs and Private Jobs categories. Filling in the Experience section matters a lot here if there’s any prior work history — recruiters typically check that field first.
Regardless of qualification, one thing stays constant — the more complete and accurate your profile is, the faster it gets matched with relevant vacancies.
Quick Checklist of Documents for Sewayojan Registration
Here’s a simple checklist you can save or print, so nothing gets missed before you start registering:
| Document | Needed At | Mandatory |
| Aadhaar card (mobile linked) | Registration | Yes |
| Active mobile number | OTP verification | Yes |
| Email ID | Signup form | Yes |
| Passport-size photo | Profile completion | Yes |
| Educational certificates | Education section | For full profile |
| Digital signature | Profile completion | For full profile |
| Caste certificate | Bhatta application | For Bhatta applicants |
| Income certificate | Bhatta application | For Bhatta applicants |
| Domicile certificate | Bhatta application | For Bhatta applicants |
| Bank account details | For DBT | For Bhatta applicants |
Keeping this checklist handy saves time — a lot of people abandon registration midway simply because they don’t have a photo or certificate ready at that moment.
Things to Watch Out For When Registering on Mobile
Most people register from their phones these days rather than a laptop or computer. A few things need extra attention in that case:
- Use Chrome or any updated browser. Older browsers often fail to load the form properly, and the captcha keeps reloading as a result.
- Try enabling desktop mode. Some fields get hidden in mobile view. Turning on “Desktop Site” in your browser settings makes the form easier to fill.
- Keep photo file sizes small. Photos taken directly from a phone camera are often too large. Compress them using any photo compression app before uploading.
- Use a stable internet connection. If your connection drops mid-way through Aadhaar OTP verification, the session can expire and you’ll have to start over.
- Keep notifications turned on. Enable alerts on both the Sandes app and SMS so you don’t miss the Aadhaar OTP.
Registration and Getting a Job — What’s the Real Connection
Many new users expect a job offer to show up right after they register. It’s worth understanding that registration is just the first step — it makes you part of the system, but it doesn’t guarantee a job.
How fast you land a job depends on several factors:
- How many active vacancies exist in your district right now
- How in-demand your qualifications and skills are
- How regularly you update your profile and check new postings
- How actively you take part in events like Rojgar Mela
That’s why staying consistent even after registering matters. Log in regularly to check new job listings, and keep SMS/email alerts turned on so you don’t miss a relevant vacancy.
Extra Tips for Rural and Semi-Urban Users
Internet access and digital literacy can be a real challenge in many districts across UP. If you’re in a rural or semi-urban area, a few things can help:
- If filling out the form yourself feels difficult, your nearest Common Service Centre (CSC) or Jan Seva Kendra can help — the operators there are usually familiar with this process.
- District employment offices also offer walk-in guidance, especially for first-time registration.
- Add your registered mobile number to the Sandes app too, since SMS delivery can sometimes be delayed while app notifications arrive instantly.
- If your Aadhaar-linked mobile number has weak signal in your area, try requesting the OTP from a spot with better network coverage.
Does Sewayojan Registration Guarantee a Job
This is something that comes up in a lot of people’s minds. The direct answer is no. Sewayojan is a facilitation platform — it connects employers with job seekers, but the final selection always rests with the employer, whether that’s a government department or a private company.
Similarly, Berojgari Bhatta isn’t automatically granted just by registering — it requires separately meeting the eligibility criteria and submitting an application.
Conclusion
Sewayojan registration is a one-time process that can feel a bit technical the first time around, but if you follow the steps in the right order and keep your documents ready beforehand, the whole thing wraps up in around 20 to 30 minutes. This registration is what opens the door to government jobs, private vacancies, Rojgar Mela, and Berojgari Bhatta.
Whenever there’s confusion about which step comes next, or an error that doesn’t make sense, the sewayojan portal already has detailed, verified, step-by-step guidance available — complete with screenshots, so you see exactly what the official website shows.
Staying Active After Registration Matters Too
Once registration is complete, it’s worth remembering something important — Sewayojan isn’t a static database where you build a profile once and forget about it. It’s a living system where employers post new vacancies daily, government departments release notifications, and Rojgar Mela schedules get updated regularly.
A few habits go a long way here:
- Log in once a week to check new job listings
- Update your profile the moment you gain a new certificate or skill
- Update the Contact section right away if your location changes, so district-level notifications reach the right place
- Keep checking the Bhatta application status on your dashboard regularly, especially if a payment is due
Small consistency pays off in the long run — many users miss out on jobs simply because they haven’t checked their profile in months. An active, updated profile always performs better than an outdated one, regardless of qualification.
Sewayojan vs Other State Portals — Why It’s Not Interchangeable
People sometimes assume employment portals work the same way across states, but that’s not the case. Sewayojan’s database, job listings, and Bhatta scheme are tied specifically to Uttar Pradesh’s Department of Training & Employment. A candidate registered on Maharashtra’s mahaswayam.gov.in, for example, won’t show up in Sewayojan’s system, and vice versa.
This matters most for people who move across state lines for work or family reasons. If you shift from UP to another state permanently, your Sewayojan registration doesn’t transfer automatically — you’d need to register fresh on that state’s portal if you want access to local government job listings there. The one exception is the National Career Service (ncs.gov.in), which pulls listings from across the country and works alongside state-level portals rather than replacing them.
For someone applying to jobs in multiple states, it often makes sense to keep the Sewayojan profile updated for UP-specific and Bhatta-related benefits, while separately checking NCS for pan-India opportunities.
Verifying Whether a Sewayojan-Related Website Is Genuine
Given how popular this portal is, quite a few unofficial websites and social media pages have started using “Sewayojan” in their name or content to attract traffic. Some genuinely just offer information, but others try to charge fees for “registration assistance” or ask for Aadhaar details directly, which is where things get risky.
A few quick ways to tell a genuine resource from a questionable one:
- The actual registration and login only ever happen on sewayojan.up.nic.in — no exceptions.
- No legitimate information source should ask you to enter your Aadhaar number or OTP anywhere except the official government site.
- Genuine informational platforms will clearly disclose that they are independent and not affiliated with the UP government, rather than implying they are the official portal.
- Be cautious of pages promising “guaranteed government job” or “fast-track Bhatta approval” in exchange for payment — no such shortcut exists in the actual system.
Sticking to the official portal for the actual transaction, and using verified information sources only for guidance, keeps the whole process safe.
What is the Sewayojan portal? Sewayojan (meaning employment facilitation) is the official employment portal of UP’s Department of Training & Employment, hosted at sewayojan.up.nic.in. It’s where UP residents register for government and private jobs and apply for Berojgari Bhatta.
How long does Sewayojan registration take? With all the documents ready, the entire process can be completed in about 20 to 30 minutes. It might take a bit longer if there’s a delay in receiving the Aadhaar OTP.
Can I register more than once? No, only one registration is considered valid per Aadhaar number. Trying to register again will cause the system to detect the existing account.
Can students register on Sewayojan too? Yes, anyone meeting the minimum qualification criteria can register, whether they’re currently studying or not. However, for Berojgari Bhatta specifically, being currently unemployed is a requirement.
How long after registering does it usually take to get a job? There’s no fixed timeline — it depends on available vacancies, your qualifications, and opportunities in your district. That’s why keeping your profile updated and checking the jobs section regularly matters.
What if my Aadhaar isn’t linked to a mobile number? You’ll need to visit the nearest Aadhaar Seva Kendra to update your mobile number first. Only after that can you successfully register on Sewayojan, since OTP verification is a mandatory part of the process.
Can profile details be edited after registration? Yes, after logging in you can update your Contact, Education, Skills, or Preference details anytime. Changing certain core details linked to Aadhaar, like Personal Info, may require additional verification.
Can two different Aadhaar registrations use the same mobile number? Not practically — since OTP verification happens on the number linked to Aadhaar, and one mobile number is generally linked to a single Aadhaar. If two family members are sharing a number, each will need their own Aadhaar-linked number updated separately.
Is Sewayojan registration free? Yes, completely free — no fee applies for Jobseeker, Employer, or Sewa Mitra registration. Anyone asking for payment isn’t part of the official process.
What documents are mandatory for Berojgari Bhatta specifically? Along with a completed Sewayojan profile, you’ll need a domicile certificate, family income certificate, a caste certificate (if applying under a reserved category benefit), and Aadhaar-linked bank account details for DBT.