
Flat and low-slope roofs across the United States face a consistent set of challenges: standing water, thermal expansion, UV degradation, and aging substrates that no longer hold traditional coatings reliably. For contractors managing commercial or residential re-roofing projects, material selection and application method are not abstract decisions — they directly affect call-back rates, warranty claims, and client relationships.
Silicone coatings have become a practical solution for restoration and waterproofing work, particularly on roofs where removing and replacing existing material is cost-prohibitive or structurally unnecessary. But like any applied system, the results depend heavily on how the product is prepared for, applied, and allowed to cure. Getting the application wrong does not just produce a poor-looking finish — it produces a roof that fails under the exact conditions it was supposed to handle.
This guide covers the full application process in the sequence that matters: from surface evaluation through final inspection, with attention to the decisions that most commonly lead to premature failure in the field.
Understanding What Roofing Silicone Is and Why Application Method Matters
Silicone roof coatings are moisture-cure elastomeric systems that bond to a wide variety of substrates, including metal, modified bitumen, single-ply membranes, and spray polyurethane foam. Unlike acrylic coatings, silicone does not re-emulsify when exposed to standing water after cure, which makes it particularly well-suited for flat roof geometry where drainage is slow or inconsistent. It also maintains flexibility across wide temperature ranges without becoming brittle in cold climates or softening in high-heat environments.
For contractors evaluating product options and application approaches, a structured Roofing Silicone guide can help clarify the differences between silicone formulations, substrate compatibility, and performance expectations across different climates and roof types. That kind of reference is useful before a contractor commits to a product line for a specific project type.
What makes silicone application distinct from other coatings is its sensitivity to surface contamination and moisture during application. Silicone cures through ambient humidity, which is an advantage in damp climates — but it also means that any oil, dust, standing water, or incompatible primer left on the surface during application will interrupt adhesion. A coating that looks intact from the ground can delaminate within a single heating season if the surface was not properly prepared before the material was applied.
Why Silicone Fails When Surface Preparation Is Skipped
The most common failure mode for silicone roofing systems is not product deficiency — it is adhesion loss caused by inadequate surface preparation. Silicone forms a mechanical and chemical bond with the substrate, and that bond requires a surface that is clean, dry, and free of anything that would act as a release layer.
On older commercial roofs, this means removing algae, efflorescence, ponded water residue, and in some cases, residual release agents from previous membrane installation. On metal roofs, rust and mill scale must be addressed. On foam substrates, chalking and oxidation affect how the coating anchors. Each substrate type introduces its own preparation requirements, and assuming that a pressure wash alone is sufficient is one of the most consistent sources of warranty disputes in the industry.
Evaluating the Roof Before Any Product Is Ordered
A site evaluation should happen before a contractor specifies a silicone system, not after. The roof’s existing condition determines whether a silicone coating is the right approach at all, and if so, what preparation work must be included in the project scope. Applying a coating over a structurally compromised or saturated roof deck does not restore the roof — it covers up a problem that will resurface, often at the seams or flashings first.
During evaluation, contractors should look at the condition of existing seams, penetrations, and flashings. These are the areas most likely to admit water and are typically the first to show coating separation if they were not addressed before the main field coat was applied. In most cases, seam reinforcement and flashing repair are necessary preliminary steps, not optional upgrades.
Moisture in the Existing Substrate
Wet insulation beneath a membrane is a condition that silicone cannot resolve. If the substrate retains moisture — whether from previous leaks, condensation, or failed drainage — that moisture needs an exit path. A coating applied over saturated insulation can trap water vapor and cause blistering or delamination as temperatures rise and the vapor pressure builds beneath the sealed surface.
Nuclear moisture scanning or infrared thermography, particularly useful when reviewed alongside standards outlined by organizations like ASTM International, can help identify saturated zones before work begins. Areas with confirmed wet insulation generally require core cuts and replacement before coating. Including this in the project scope upfront is far less disruptive than diagnosing blistering failures after the coating has cured.
Priming and Seam Reinforcement Before the Main Coat
Primer selection depends on substrate type and, in some cases, ambient conditions at the time of application. On metal substrates, a rust-inhibiting primer is typically required to stabilize the surface and create a bonding layer compatible with the silicone system. On some single-ply membranes, certain silicone products may bond directly without a primer, but this should be verified with the manufacturer for each specific product and substrate combination — not assumed based on general industry practice.
Seam and penetration reinforcement is a separate step from priming and should be treated as such. Seam tape or fabric reinforcement embedded in a base coat of silicone creates a bridged detail that can handle the movement that occurs at joints and transitions. Skipping this step and relying on the field coat to span seam gaps is a compromise that consistently produces leaks at those exact locations under thermal cycling.
Application Sequencing Around Penetrations
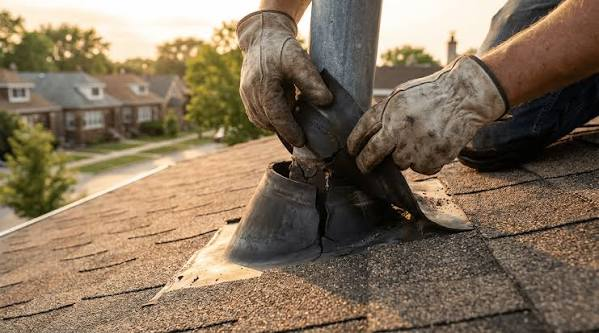
Penetrations — HVAC equipment, pipe boots, drains, and curbs — represent a disproportionate share of roofing leak sources relative to their surface area. Detailing these areas correctly before applying the field coat ensures that the final system is continuous and that transitions are properly sealed.
Each penetration should be cleaned, primed if required, and addressed with a reinforced detail coat before the main application begins. Working from the penetrations outward — rather than coating the field first and returning to details — reduces the risk of contaminating freshly coated surfaces during the detail work and ensures that the field coat overlaps and integrates with the completed penetration seals.
Applying the Field Coat: Method, Coverage, and Conditions
Silicone field coats are applied by spray, roller, or brush depending on roof geometry, accessibility, and the viscosity of the specific product. Spray application allows for faster coverage on large, open areas and produces a more uniform mil thickness when the equipment is properly calibrated. Roller application is more controllable in tight areas or around equipment, but requires consistent technique to avoid thin spots that compromise the waterproofing system.
Coverage rate is one of the most practically important variables in the application process. Applying silicone too thin results in a system that does not meet the intended dry mil thickness and may allow UV degradation or water infiltration over time. Applying too thick — particularly in a single heavy pass — can cause sagging on slopes and uneven cure in the lower layers. Most systems are designed to be applied in multiple passes, allowing each layer to begin curing before the next is added.
Weather and Environmental Conditions During Application
Silicone cures through contact with atmospheric humidity, which means application in extremely dry conditions can slow cure times. Application in rain or on a wet surface is not acceptable — moisture on the surface during application, rather than in the ambient air, prevents adhesion rather than promoting cure.
Temperature is also a practical consideration. Very cold surfaces slow the cure process significantly, and silicone applied to a surface below the manufacturer’s recommended minimum temperature may not develop the adhesion or flexibility the system is rated for. In northern states during shoulder seasons, surface temperature — not just air temperature — needs to be checked before application begins each day.
Inspection, Documentation, and Handoff
After the final coat has cured, a structured inspection confirms that the system is complete and performing as intended before the project is closed out. This includes checking for pinholes, thin areas, missed penetration details, and any sections where coverage appears inconsistent. A wet sponge tester can identify holidays — small gaps in coverage — in areas of concern before the client takes possession of the work.
Documentation at project completion serves both the contractor and the client. Photographs of surface preparation, primer application, reinforced seam details, and the completed field coat create a record that supports any warranty claim and demonstrates that the application was performed correctly. In commercial work especially, this documentation is frequently requested during building sales, insurance reviews, or future roofing assessments.
Setting Client Expectations Around Maintenance
A silicone coating system, like any roofing assembly, performs best when it receives periodic maintenance. Debris that accumulates at drains and penetrations can hold moisture against the coated surface over extended periods, and foot traffic from HVAC or other equipment servicing can damage the coating if areas are not protected.
Communicating a basic maintenance schedule to the client at handoff — including drain clearing, visual inspection after major weather events, and early reporting of any visible damage — reduces the likelihood of preventable deterioration and helps preserve the system’s service life.
Closing: Why Process Discipline Determines Outcome
Applying roofing silicone correctly is less about product selection and more about the discipline applied at each stage of the process. The material itself is well-suited for the conditions it is marketed for. Where contractors encounter callbacks and failures, it is almost always traceable to a preparation step that was shortened, a detail that was skipped, or an application condition that was not adequate for the product being used.
The contractors who build reputations for reliable roofing silicone work are not necessarily using different products than their competitors. They are executing consistently — preparing surfaces thoroughly, reinforcing transitions before field coating, controlling application conditions, and inspecting the completed system before handoff. That consistency is what separates a coating that performs across multiple seasons from one that begins showing problems within the first year.
For contractors entering this product category or expanding their restoration work, the investment in proper process — including training crews on surface preparation and application sequencing — pays returns in reduced warranty claims, stronger client referrals, and the ability to price work based on quality rather than competing at the bottom of the market.
